Setting up the Receipt Printer
To set up the receipt printer
that will be used by PAYD Pro
PlusTM
In-Store, follow the instructions below. During setup, you can test the
printer as well as select a logo image to be printed on your receipts.
To set up and test the receipt printer:
Close out of PAYD Pro Plus
on the computer to which you want to connect the printer.
Unpack the printer.
Follow the printer manufacturer’s
instructions to:
Install
the drivers on the computer to which you want to connect the printer.
Connect
cables to the printer and connect the printer to the computer.
Load
the paper roll into the printer.
Power
on the printer.
Install the OPOS drivers
in Windows.
Open PAYD Pro Plus and
launch the POS view.
Click the Tools
tab.
Click the Hardware
Setup button.
The POS – Hardware Setup popup appears
with the Scanner tab selected by default.
Click the Receipt
Printer tab.
Click the Receipt
Printer drop-down menu and select your receipt printer from
the list of installed printers.
NOTE: Your
receipt printer may have a different name than the one displayed here.
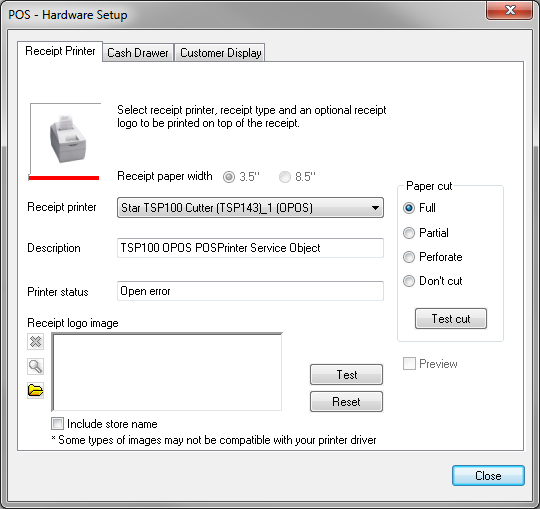
Click the Test
button. Your printer will print a sample receipt.
Click the Close
button at the bottom of the POS – Hardware Setup popup.
Repeat steps 1 – 11 to
install printers on other POS lanes as needed.
NOTE:
For changes to take effect, close down all browser windows and re-start
PAYD Pro Plus In-Store POS view.
To select a receipt logo image:
In
the Receipt Printer tab of
the POS - Hardware Setup screen, click the Browse
button ( ).
).
The Receipt logo image popup appears.
Browse
your computer's hard drive to locate the image file you wish to use
as your receipt logo.
NOTE: The image
file must be stored on your hard drive as a bitmap (.bmp) file.
Click
the Test button.
A test receipt that includes the
logo at the top prints.
If
you are satisfied with the way the image looks, click Close.
OR
If you wish to select a different image, click the red  button to remove the current image. Repeat steps 1 - 3 again.
Related Topics:
Configuring Merchant Receipt
Options
Setting
up POS Hardware
Using
POS Tools