On the PAYD Administration main screen, click the Configuration icon ( ).
).
The Configuration menu appears.
On the Configuration menu, click Contact Information.
Use the Contact Information screen to configure your merchant contact information. Contact information is used in printed receipts and orders.
On the PAYD Administration main screen, click the Configuration icon ().
The Configuration menu appears.
On the Configuration menu, click Contact Information.
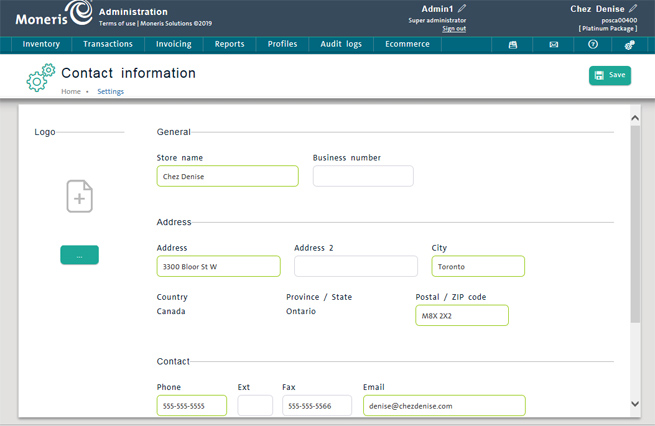
Complete the fields as follows (required fields are highlighted yellow):
Logo
Logo - To add a logo image for the merchant, click the ellipsis button ( ), select the file for the logo image in the file dialogue, and then click Open.
General
Store Name - Enter the name of your store/business (required).
Business number - If your business is numbered, enter the business number into this field. It will print on invoices and receipts.
Address
Address - Enter your business street address (required).
City - Enter the city where your business is located (required).
Country - By default, this value is already entered based on the information provided when you activated PAYD Pro PlusTM, and is not editable.
Province/State - By default, this value is already entered based on the information provided when you activated PAYD Pro Plus, and is not editable.
Postal/ZIP code - Enter your business postal or zip code (required).
Contact
Phone - Enter your business main phone number including area code (required). If applicable, enter an extension in the Ext field.
Fax - Enter your business fax number including area code.
Email - Enter your business email address (required).
URL - If applicable, enter your business' corporate website address into this field.
Click the Save button at the top of the screen.
If you added a logo image, a thumbnail of the image is displayed.
TIP: To remove the logo image, click the Trashcan button ( ) next to the thumbnail. The system will display a confirmation popup. Click Ok to delete the image, or Cancel to cancel the operation and return to the Contact Information screen.
Configuring Store Contact Information (Mobile)