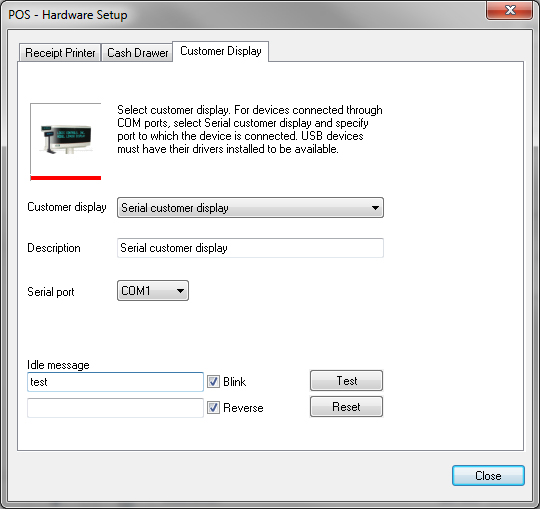
To set up the customer display device that will be used by PAYD Pro PlusTM In-Store, you must select a device that has already been installed and properly configured on your system. You also have the option of using a serial COM port display device. During set up, you can test the device.
On the POS view, click the Tools tab.
On the Tools button panel, click Hardware Setup.
The POS - Hardware Setup window appears with the Receipt Printer tab selected.
Click the Customer Display tab.
From the Customer display drop-down list, select the display device you want to set up.
A description of the selected device appears in the Description textbox.
NOTE: If you select a display device connected through a COM port, select the port number from the Serial port drop-down list.
To test the display device, enter text in the Idle message textboxes and click the Test button.
To test text display options, select the Blink and Reverse checkboxes as needed.

To clear the test text, click the Reset button.
To close the popup, click Close.
NOTE: For changes to take effect, close down all browser windows and re-start PAYD Pro Plus In-Store POS view.