Selecting the Dymo Labels
You can work with pre-defined Moneris label layouts, or you can design your own custom label layout. Follow the instructions below to select the label layout you wish to use to print product labels.
NOTE: These instructions assume that you have installed the DYMO Label software on your laptop or computer, and selected the label layout in the DYMO Label software.
-
From the PAYD Administration main screen, click Inventory.
-
On the Inventory menu, click Product List.
-
On the Product Search Results screen, place a checkmark in the checkbox to the left of any one of the products listed, then click the Print Labels ( ) icon at the top of the screen.
-
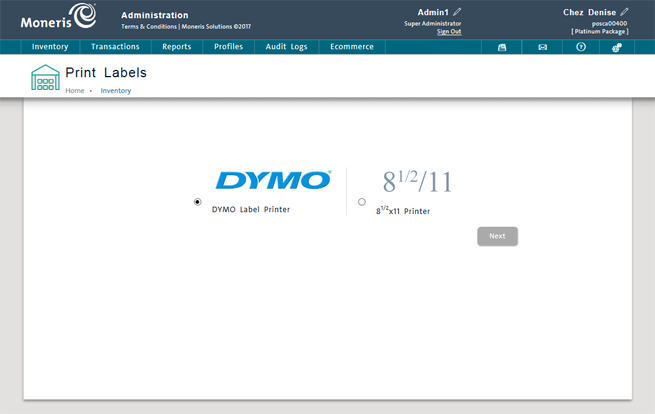
On the Print Labels screen, click the DYMO option and click Next.
-
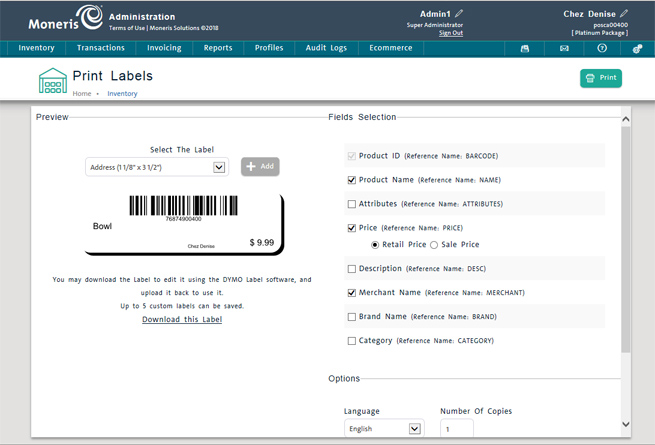
On the left side of the Print Labels screen, under the Select The Label heading, choose the label layout you wish to use:
● If you are using a Moneris-defined label layout, click the drop-down menu and select it from the list. Proceed to step 9.
NOTE: The labels are listed by their dimensions.
● If you are using a custom label that you defined in the DYMO Label software, click the Add button and proceed to step 6.
-
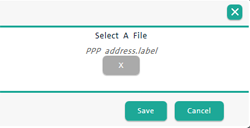
In the Select A File popup, click the ellipsis button ( ).
).
-
Browse your computer's hard drive for the label layout you saved in the DYMO Label software, then click Open.
-
In the Select A File popup, click Save.
-
In the Fields Selection section on the right side of the screen, place checkmarks beside the items you wish to include on the printed label.
NOTE: If you select items that you have not defined on the label layout in the DYMO software, they will not print properly on the label.
-
Use the Options section on the right side to select the label language, number of copies, and the printer you are going to use (in this case the Dymo LabelWriter).
-
Click the Print button at the top of the screen. Go to Printing Product Labels for more information.
Related Topics
Installing the Dymo LabelWriter
Customizing the Label Layout
Printing Product Labels
![]() ) icon at the top of the screen.
) icon at the top of the screen.

 ).
).
