The term CSS is an acronym for Cascading Style Sheets. CSS is used to design and style webpages written in a markup language like HTML .It helps to separate the content of the document (e.g. paragraphs and text) from the layout elements like layout, colour and font instructions to make content more accessible and ensure a consistent look and feel to multiple pages of a website.
PAYD Pro Plus includes an import tool that enables you to import a CSS that was designed by a third-party such as a web developer. The CSS file needs to be saved on your local hard drive before it can be imported. Alternatively you can copy the text of a CSS file and paste it into the text box in the Custom CSS tab.
NOTE:The ecommerce section does not provide tools to develop your own CSS. CSS development is done using markup languages outside of PAYD Pro Plus. We are merely providing a tool to import CSS from an external source, or a textbox for you to enter your own CSS instructions (if you know the language) .
NOTE: The CSS file needs to be stored on your computer's hard drive before you can begin this procedure.
On the PAYD Administration main screen, click Ecommerce.
On the Ecommerce menu, under the Site section, click Themes.
In the Themes screen, click on the name of the theme to which you wish to upload the custom CSS.
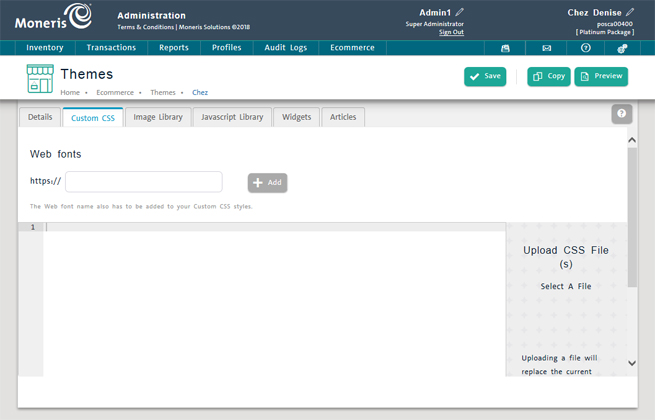
In the theme's profile screen, click the Custom CSS tab.
On the right side of the Custom CSS tab, click the Upload CSS File(s) button ( ).
).
In the Choose File to Upload dialog box, browse to where the CSS file is stored on your hard drive. Once you have located the file, highlight it and click the Open button.
The Choose File to Upload dialog box will close and you will be returned to the Custom CSS tab. You should be able to see the CSS information populating the large text field in the middle of the screen.
● Click the Preview button.
A separate web browser window will open, and the instructions contained in the CSS file will be applied to your website content.
● Click the Publish button.
This will upload the CSS to your website immediately.
● Make changes to the CSS file by editing the CSS file, or by editing the text within the large text field in the middle of the screen.
OR
● Send it off to the third party developers with your change specifications.
When you receive the revised CSS, follow the directions above to replace the current CSS with the revisions.
Be aware that you may need to go through several revisions of the CSS before you get results that can be published.
In the Themes screen, click the Custom CSS tab.
In the Custom CSS tab, click inside the large text field in the middle of the screen.
Highlight all the text and press the Delete key on your keyboard.
Click the Publish button.
This will essentially remove all CSS styling from your website and restore it to its default layout.
In addition to the fonts stored on your computer, the internet has many open-source fonts that you can use to alter the text on your ecommerce website.
To add a web font to your custom CSS:
Click inside the http:// field at the top of the screen.
Paste the URL (web address) of your selected font into the field.
Click the Add button.
The font appears to the right.
Click the Save button at the top of the screen.
NOTE: You will need to make changes to your CSS so that it recognizes your new web font.
Click the Preview button to preview how the new font looks.
If you are satisfied, you can move on. If something needs to be altered, repeat steps 1 - 5.
Designing the Ecommerce Website
Incorporating Javascript into your Website