It is possible to add images to an ecommerce article to make the article appear more attractive. Images will appear in the article at the insertion point (the place in the document where the cursor was flashing when the Insert Custom Link button ![]() was clicked). It is also possible to insert another previously created article into the article you are currently editing.
was clicked). It is also possible to insert another previously created article into the article you are currently editing.
In the HTML Text editor window, locate your desired insertion point for the image.
Click the Insert Custom Link button (![]() ).
).
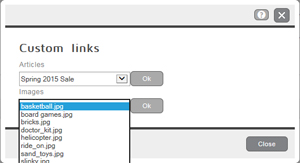
The Custom links popup appears.
Click the Images drop-down menu and select an image from the list.
NOTE: This list is populated by image files stored in the theme's image library.
Click the OK button.
The HTML Text editor reappears.
Repeat steps 1 - 4 to insert additional images into your article as necessary.
To delete an image from within an article:
In the HTML Text editor, click the image to select it.
The Insert Image popup appears.
Click the Delete button.
The HTML Text editor reappears.
Repeat steps 1 and 2 as needed to delete additional images.
In the HTML Text editor window, locate your desired insertion point for the image.
Click the Insert Custom Link button (![]() ).
).
The Custom links popup appears.
Click the Articles drop-down menu and select an article from the list.
NOTE: This list is populated by other articles you have previously created and saved.
Click the OK button.
The HTML Text editor reappears.
Repeat steps 1 - 4 to insert additional articles into your current article as necessary.