The HTML Text Editor is accessed from several different screens within PAYD Administration:
the Mass Mailing screen
the Ecommerce Articles screen
the Ecommerce - Options screen (email header and footer configuration)
emails that are generated from Ecommerce orders
emailed invoices generated from the Invoicing feature.
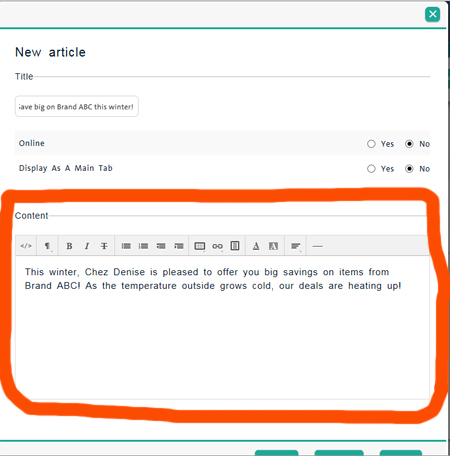
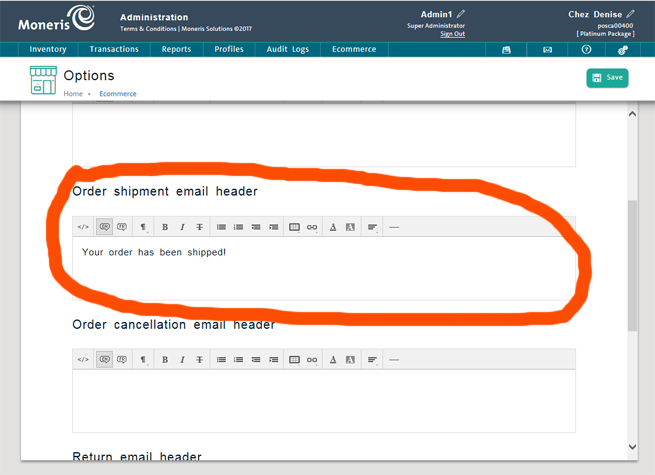
The HTML editors pictured below on the left belongs to the Ecommerce Articles screen, and is used to draft ecommerce articles. The editor pictured on the right comes from the Ecommerce - Options screen. The editor will look the same no matter where it is accessed from: the difference is in the screen elements around it.
When you click inside certain text fields within these screens, an editor dialog box appears blank by default. You can type your text into this box, or copy/paste from other documents or HTML web pages. Refer to the table below for an explanation of the screen elements.
NOTE: Some of these buttons may or may not appear based on the screen from which the text editor is launched. Some screens launch modified editors that only require specific functions.
|
This button: |
Performs this task: |
|
|
● Shows the text in HTML. The HTML tags will be visible. Click the button again and the text reverts to normal and the HTML tags are hidden. |
|
|
● Toggles between content to be tagged for the English or French version of the website. When the EN button is depressed, you are creating content for the English website. When the FR button is depressed, you are creating content for the French website. When either button is depressed, the opposite content is hidden e.g. when working on French content, the English content is hidden and vice-versa. ● The default is EN (English). NOTE: Only use this button if your website is set to display in both languages. |
|
|
● Applies formatting styles to highlighted text e.g. Heading 1 style, Heading 4 style, Paragraph style etc. ● Once the button is clicked, a popup list appears featuring the formatting styles. Click on the formatting style to use e.g. if you want to apply the Heading 2 style to selected text, click on Heading 2 in the popup list. |
|
|
● Applies Bold, Italic and/or Underlined style respectively to highlighted text. |
|
|
● Sorts highlighted text into an unordered (bulleted) list placing a bullet for each carriage return (when the Enter key is pressed on the keyboard). |
|
|
● Sorts highlighted text into an ordered (numbered) list placing a number for each carriage return (when the Enter key is pressed on the keyboard). |
|
|
● Moves highlighted text one tab stop to the left (outdent). |
|
|
● Moves highlighted text one tab stop to the right (indent). |
|
|
● Inserts a table at the cursor position. Select the number of columns and rows in the Table dialog box that appears and click the Insert button. There are other options to add/delete headers, rows and columns as needed. |
|
|
● Inserts a hyperlink. Refer to Working With Hyperlinks for more information. |
|
|
● Changes the colour of the highlighted text. Choose a colour from the colour palette that appears. |
|
|
● Changes the background colour of the highlighted text. Choose a colour from the colour palette that appears. |
|
|
● Changes the alignment of the highlighted text - left, centre, right or justify. |
|
|
● Inserts a horizontal line at the cursor position. |
Creating Ecommerce Website Articles
Adding Hyperlinks to Ecommerce Articles
Adding Images to Ecommerce Articles