An image library provides images that can be used by the widgets and articles. Image files must be stored on your computer's local hard drive in JPG, PNG or GIF formats.
NOTE: You should not add product images to the library. Product images are assigned to the individual products in their profile. This image library is used primarily for images for the website like company logos, full page flyers etc.
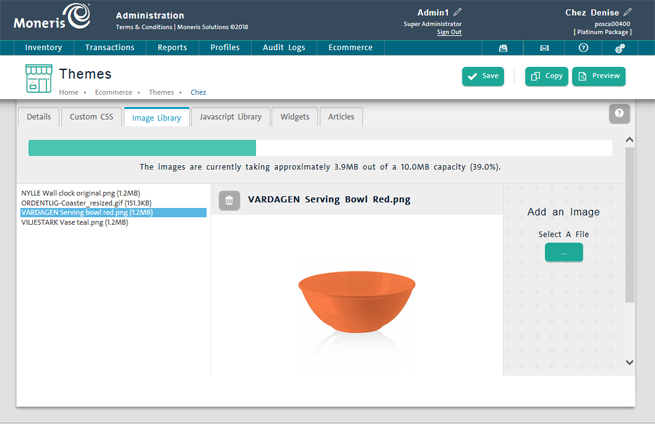
The list on the left side of the screen keeps track of the current image files contained in the library. A thumbnail preview of a selected image appears on the right side of the screen. At the top of the screen, a progress bar shows how much of your allotted storage capacity is being used by the current files in the library.
From the PAYD Administration main screen, click the Ecommerce menu.
On the Ecommerce menu, under the Site section, click Themes.
In the Themes screen, click the theme name in the list to which you wish to add the library.
The theme's profile loads up.
In the Themes screen, click the Image Library tab.
In the Image Library tab, click the Select a File button ( ) in the Add an Image section on the right side of the screen.
A Choose File to Upload dialog box opens.
In the Choose File to Upload dialog box, browse to the folder where your files are stored.
Select the file and click the Open button.
The Choose File to Upload dialog box closes and you are returned to the Image Library tab. The file name you selected appears in italics.
Click the Save button at the top of the screen. The image thumbnail will appear above and the file will be added to the library list on the left side of the screen.
In the Themes screen, click the Image library tab.
In the Image Library tab, highlight the file in the library list on the left side of the screen. Its thumbnail appears to the right.
Click the Delete button (![]() ) within the thumbnail area.
) within the thumbnail area.
A popup prompts you to confirm the deletion. Click the Yes button to delete the image file.
The file disappears from the library list.
Click the Save button at the top of the screen.
Managing Ecommerce Website Themes
Creating a Text/Image Hyperlink Widget