A Shop by Brand widget is an easy way for your online customers to quickly locate items to purchase on your ecommerce website. Follow these two easy steps to place a Shop by Brand widget on your eCommerce website:
From the PAYD Administration main screen, click Ecommerce.
On the Ecommerce menu, under the Site section, click Themes.
In the Themes screen, click on the theme name.
The theme's profile screen appears.
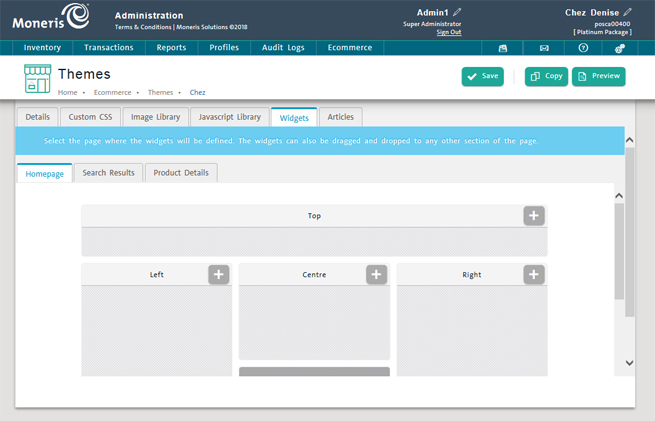
Click the Widgets tab on the top of the screen.
Select the tab which represents to page on which you want your widget to appear. Choose from:
● Homepage - This is the default tab selected. Homepage represents your ecommerce website's home page. This is the page that customers will see first when they arrive at your website.
● Search Results - This tab represents a Search Results page that will appear once a customer has used search functionality on the ecommerce website to search for something.
● Product Details - This tab represents a product details page that is unique to each product clicked on from the homepage or from search results. When a customer clicks on a product, the product details page loads up.
Once you have selected the tab, use the mock-up of the web page to select the area of the web page on which you want the widget to appear. Choose from:
● Top
● Left
● Centre
● Right
● Bottom
● Footer
● Absolute Positioning.
In the area of the page where you wish to add the widget, click the ![]() button.
button.
The New widget screen will appear.
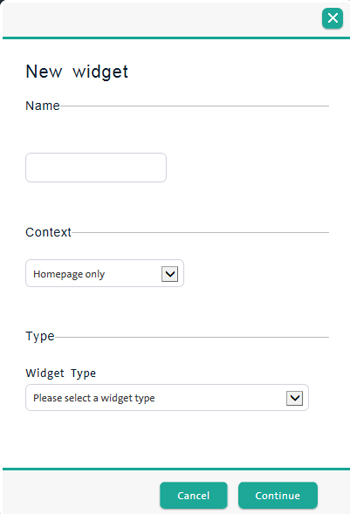
In the Name field, enter the widget's name.
Click the Context drop-down menu and select the context in which you would like the widget to appear following these guidelines:
● All contexts - The widget will appear on every page of your ecommerce website in the area you selected in steps 6 and 7.
● Homepage only - The widget will only appear on the homepage of your ecommerce website in the area you selected in steps 6 and 7.
● Search Results only - The widget will only appear on the Search Results page of your ecommerce website in the area you selected in steps 6 and 7.
● Product Details only - The widget will only appear on the product details page of an item that the user clicked in the area you selected in steps 6 and 7.
Click the Widget Type drop-down menu and select Shop by Brand.
Click the Continue button.
A profile screen appears that enables you to define the widget's behaviour and determine what brands will be included. The Name fields will already be populated by whatever you entered in step 8.

Complete the fields in the Details section as follows:
● Optional Div ID - the div ID is an alphanumeric identifier for the widget. This identifier is used by CSS to refer to the widget. The value entered here should be unique (e.g. do not use this div ID for multiple widgets).
● Online - use these radio buttons to select whether or not the widget will be visible on your ecommerce website. Select Yes to make the Shop by Brands widget visible; select No to remove it from your site.
● Context - use this drop-down menu to select which pages of the ecommerce website will display the Shop by Brands widget. Select All to have it appear on all ecommerce pages; select Homepage to have it appear only on the homepage; select Search Results to have it appear only on the results of a product search; select Product Details to have it appear only on a product's details page.
NOTE: The Context options are mutually exclusive - you cannot choose to have a Widget appear in Homepage and Search Results. It can only appear in one place or all places.
● Maximum number to display - enter a numeric value between 1 and 99 in this field to determine how many brands will be displayed within the widget. For example, entering '20' into this field means 20 products will be displayed. Leave the field blank for no limit.
● Display Options - click this drop-down menu and select the way you want your brands to display on the customer's web browser. Select from the following options:
• Name only - This option will only display the brand name as entered in the Inventory - Brands screen.
• Name and Logo - This option will display both the brand name and its logo as entered in the Inventory - Brands screen.
NOTE: Only select this option if all brand names have logos associated with the brand profiles in the Inventory - Brands screen. If only some brands have logos, the widget will not display as intended.
• Logo Only - This option will only display the brand's logo as entered in the Inventory - Brands screen.
NOTE: Only select this option if all brand names have logos associated with the brand profiles in the Inventory - Brands screen. If only some brands have logos, the widget will not display as intended.
Click the Save button on the bottom of the popup
.
● Refer to the Deleting Widgets topic for more information.
Creating a Shop by Category Widget
Creating an Image Slide Show Widget
Creating a Text/Image Hyperlink Widget