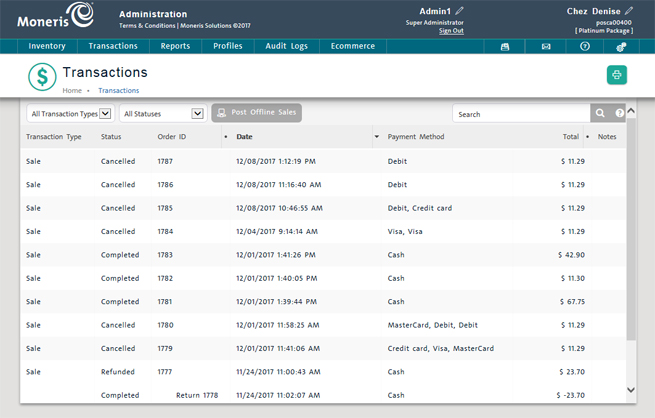
View order summary information in the Transactions screen. View order details in the Transactions screen.
On the PAYD Administration main screen, click Transactions.
The Transactions screen appears, displaying a list of transactions on your system, sorted in descending order by date and time.

The list contains the following summary information for each listed item.
Transaction Type: N/A, Order, Sale, Return, Independent Refund, Payout, Exchange, Layaway, Invoice.
NOTE: Refund transactions are identified with a Refunded status (see below).
Status - The status of the transaction:
o Completed - A successfully completed transaction (including voided sales).
o Refunded - A sale whose entire amount has been refunded to the customer.
o Partially Refunded - A sale with a partial amount refunded to the customer
o Cancelled - An invoice or layaway that was cancelled and whose payment to-date has been refunded to the customer. Also an integrated credit sale or refund that was terminated before the card transaction could be successfully completed (e.g., the transaction failed or was declined). Split tender sales and refunds are also Cancelled when the first transaction fails or is declined)
NOTE: In this case and if possible, you should re-attempt the sale or refund before terminating it by using a different card or tender type.
o Incomplete - An integrated split tender credit sale that was terminated before the second tender transaction could be processed successfully.
NOTE: You should void an Incomplete sale by voiding its first transaction following the normal single tender split procedure.
o Pending - An invoice or layaway whose full payment is not complete. Also a transaction that must be force posted in order to update your the PAYD Pro PlusTM system and reconcile it with backend servers. the PAYD Pro Plus has two types of pending transactions: 1) Offline transactions are sales transacted while it is in Offline Mode. 2) Card Present IVR transactions are card present credit sales requiring authorization via IVR.
Order ID - The ID assigned by PAYD Pro Plus to the transaction.
Date - The date and time of the transaction (mm/dd/yy hh:mm:ss AM/PM).
Payment Method - The payment method of the transaction: Cash, Debit, Visa, MasterCard, American Express, Discover/Novus Card, Other, Gift Card, Cheque, Store Credit.
NOTE: On split tender transactions, both payment methods are listed. On Incomplete sales, Payment Method is n/a. On payouts, Payment Method is always Cash.
Total - The $ amount of the transaction.
In the top left side of the screen, click the All Transaction Types drop-down menu and select from the following options:
Order (Web) - Orders that are placed through the eCommerce website.
NOTE: Only merchants using the PAYD Pro Plus eCommerce module and integrated payment processing will be able to see this type listed.
Sale - Includes Completed, Partially Refunded and Pending sales (excludes refunded and voided sales).
Return - Includes fully refunded sales.
Independent Refund - Includes independent refunds.
Payout - Includes payouts processed in the POS view.
Exchange - Includes transactions where an item or items were returned in exchange for other items.
Layaway - Includes Pending and Completed layaway sales.
Invoice - Includes Pending and Completed invoiced sales.
Once the desired transaction type is selected, the system processes the request and the results list displays only the selected type.
Click the heading of the column you want to sort on (highlighted on mouseover).
Click again on a heading to toggle between descending and ascending order.
Use the navigation bar at the bottom of the list. The current page is highlighted.

On the transaction list, click the Order ID.
The Transactions screen appears with the General Information tab selected.
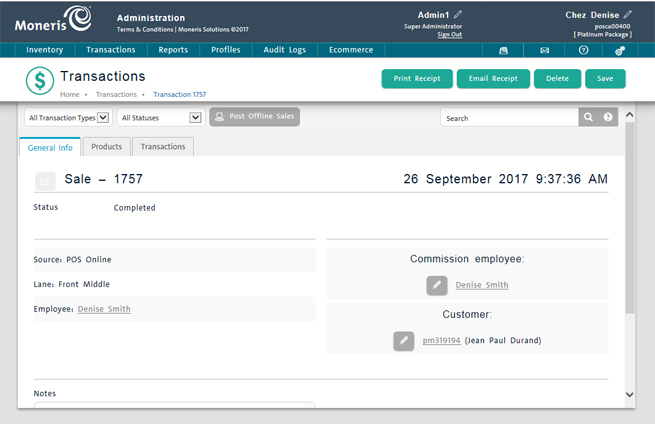
To view employee details for the employee who performed the transaction, click the Employee link.
To view employee details for the Commission Employee (if you use commissions), click the Commission Employee link.
NOTE: To assign a different employee to receive the commission, click the Reassign button (![]() ) and then select another employee from the Assign Employee popup by checking the checkbox next to that employee's name. .
) and then select another employee from the Assign Employee popup by checking the checkbox next to that employee's name. .
To view customer details (unless the sale was anonymous), click the Customer link.
To email a copy of the receipt, click the Email Receipt button in the top right corner of the screen. Refer to Emailing Receipt Copies for more information.
To print a copy of the order (as an invoice on 8.5 x 11 paper), click the Print Receipt button in the top right corner of the screen. A File Download dialog box launches. Choose one of the following:
Click Open to open the order as a PDF invoice in Adobe Acrobat Reader. You can print from inside the PDF window.
Click Save to save a copy of the order as a PDF onto your computer's hard drive. Browse for a folder in which to save your PDF invoice.
Click the Cancel button to cancel the operation and return to the Transactions screen.
NOTE: To assign a different customer, click the Reassign button (![]() ) and then select another customer from the Assign Customer popup by checking the checkbox next to that customer's name.
) and then select another customer from the Assign Customer popup by checking the checkbox next to that customer's name.
To delete the order, click the Delete button. A verification screen appears asking if you are sure. Click the OK button to delete the order, otherwise click the Cancel button to cancel the operation and return to the Transactions screen. See Deleting Orders for more information.
WARNING: Deleting orders can impact reporting.
Click the Products tab.
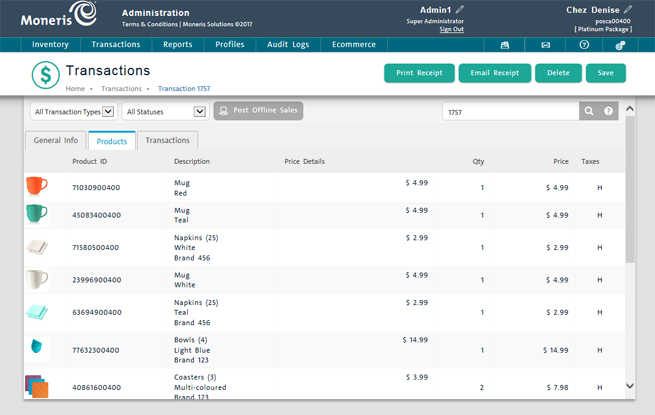
To view further details about a product, click its Product ID.
To reschedule a Service Date for a product (if one is set), click the Choose button beside the scheduled date and then select the new service date (to delete a scheduled date, click its Remove button ![]() ).
).
Click the Transactions tab.
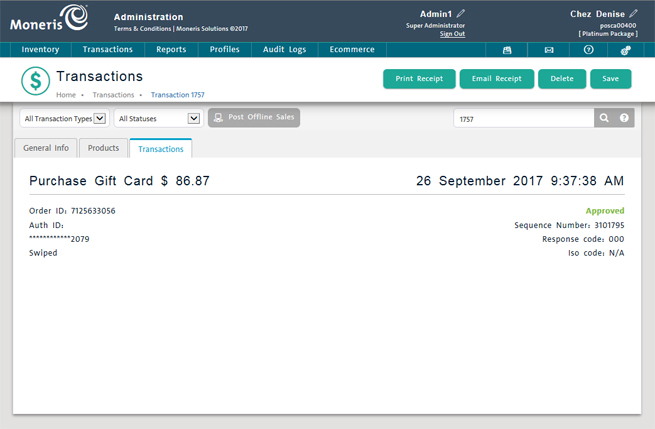
On the order list, click the Order ID.
The Independent Refund details appear with the General Information tab selected.
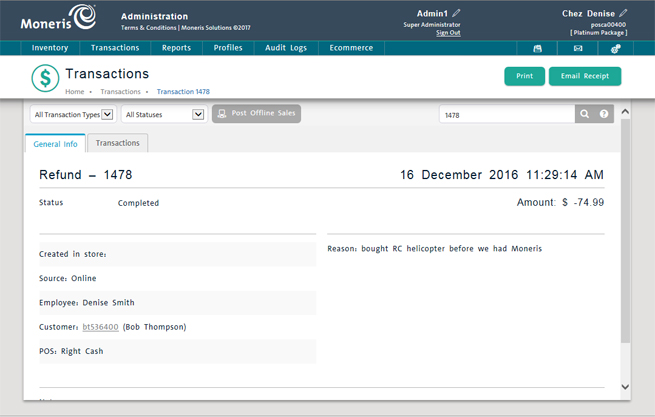
TIP: To view employee details, click the Employee ID link.
To view details of the associated transaction, click the Transactions tab.
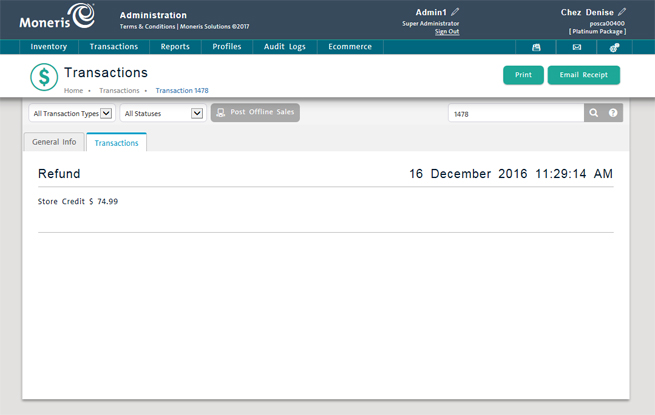
The Transactions Management View
Transacting a Return: Quickview